|
|
NLRM Troubleshooting GuideHere are solutions to common problems you may find while working with NLRM. NLRM doesn't have permission to read/writeNLRM requires read/write access on these folders:
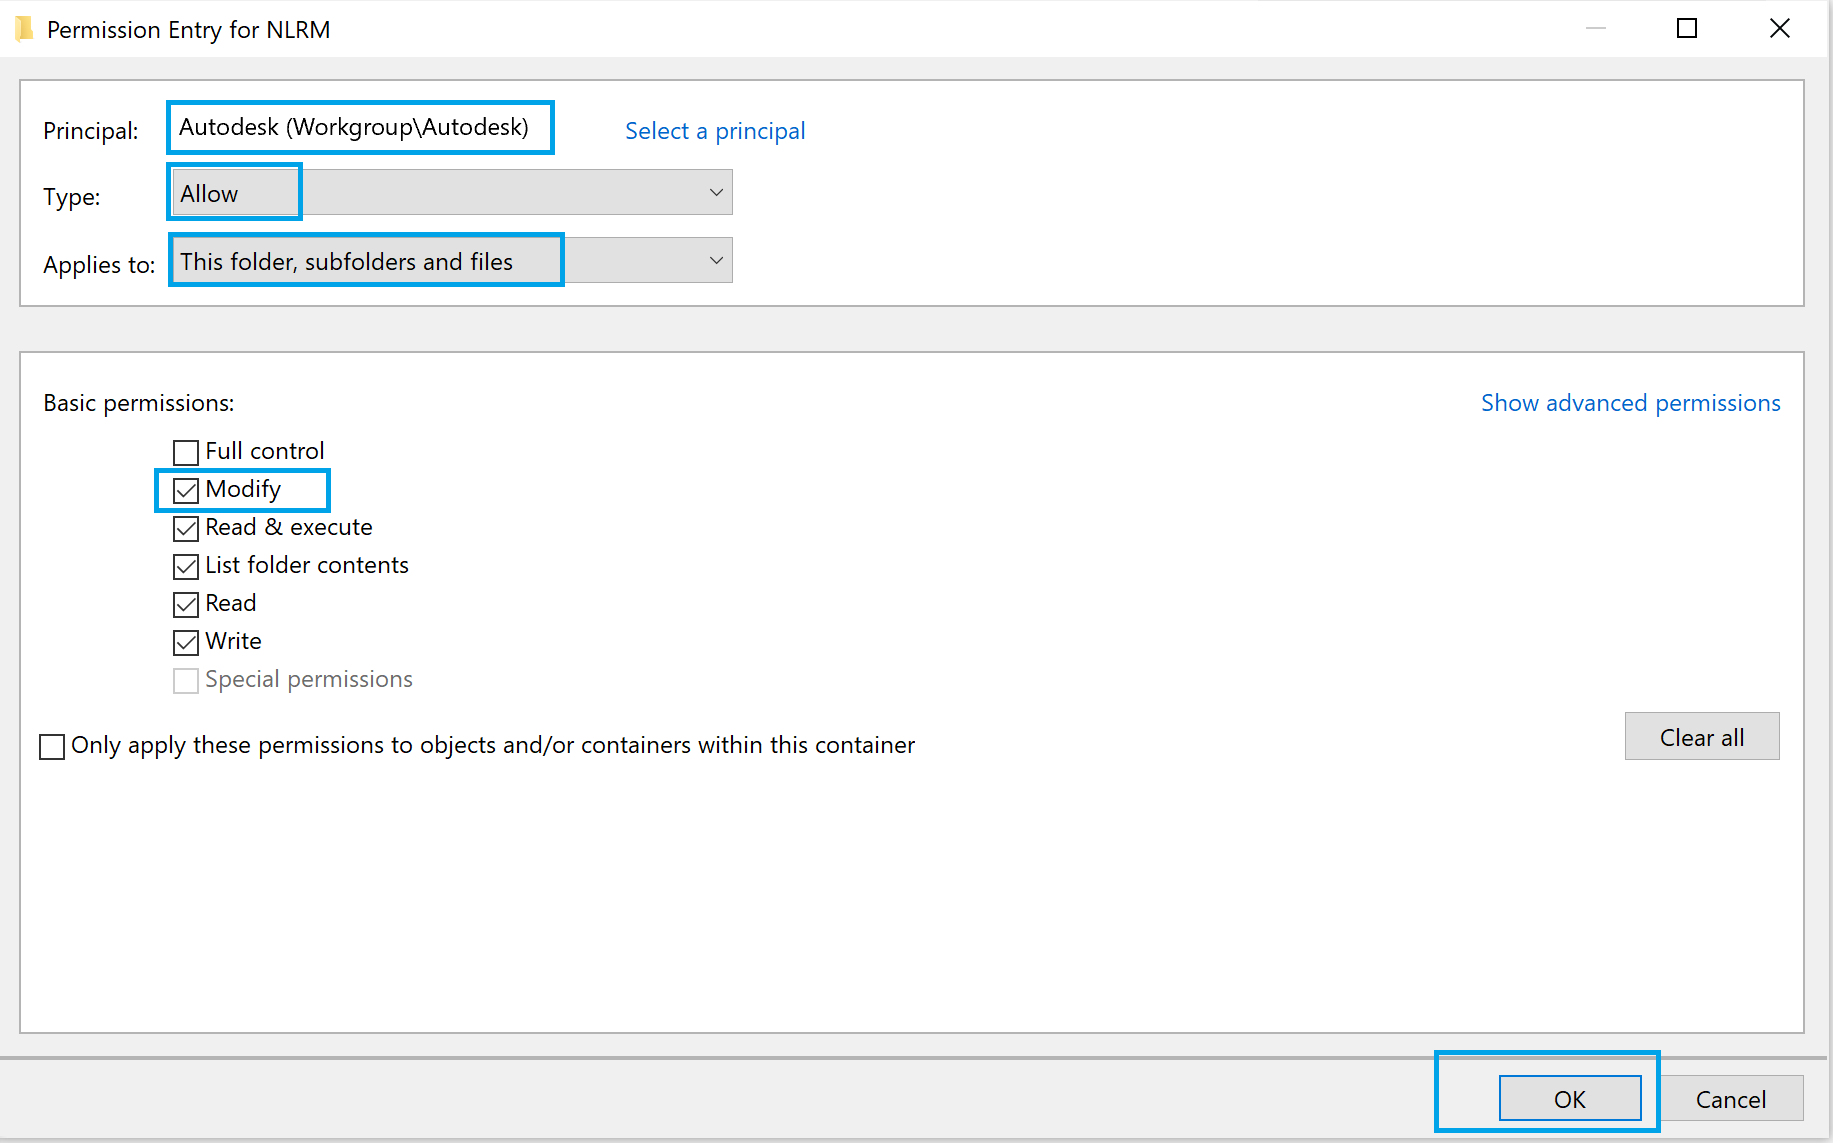
Important: The local service account configured to run NLRM (typically the account running adskflex/lmgrd) must have read/write permissions on these folders. It is recommended to grant these permissions during installation to avoid issues later. Note: Lack of read/write permissions can prevent NLRM from functioning correctly, including the ability to extract and write log files. If you encounter issues with missing or incomplete logs, verify that the service account has the necessary permissions on these folders. NLRM may not have this access if you haven't granted permissions, or if any antivirus software is preventing it. Here are solutions to these two problems. The NLRM user account lacks read/write permissionYou can grant the permission to the account running adskflex/lmgrd on either the parent directory or only the required folders or files. Note that it’s simpler to set permissions on the parent directory. The steps for each of these solutions follows. To grant permissions on the parent directory:
To grant permissions to only the required folder/file(s), use the settings in the following table.Note: Logs are rotated with the file name suffix -{n}. Default behavior is to retain not more than 12 rotations of each log file.
Antivirus software like Windows Defender is restricting read/write accessWhen your antivirus software interferes with access, you need to exclude the NLRM folders from antivirus scanning. Note: These instructions correspond to use of Windows Defender on Windows Server version 2019. If you’re running different antivirus software or a different version of Windows Server, use this steps as a general guideline. Configure Windows Defender as follows:
NLRM connectivity to Autodesk ServersTest your NLRM connectivity with Autodesk by running nlrm_config, which is included in the NLRM installation folder. Windows
Linux
Note: If the connection test fails, check proxy setup and firewall settings Proxy SetupOn Linux, NLRM supports non-authenticated proxy. Authenticated Proxy TroubleshootingFor Authenticated Proxy troubleshooting, please refer: Authenticated Proxy Windows Configuration Guide Non-authenticated proxy server can be configured using the steps given below. NLRM will report license usage data to Autodesk through the configured proxy server. Non-Authenticated Proxy TroubleshootingWindows
Linux
Firewall SettingsAllowed URLsThe table below lists the URLs / protocols that should be made accessible from the license server for NLRM to work correctly.
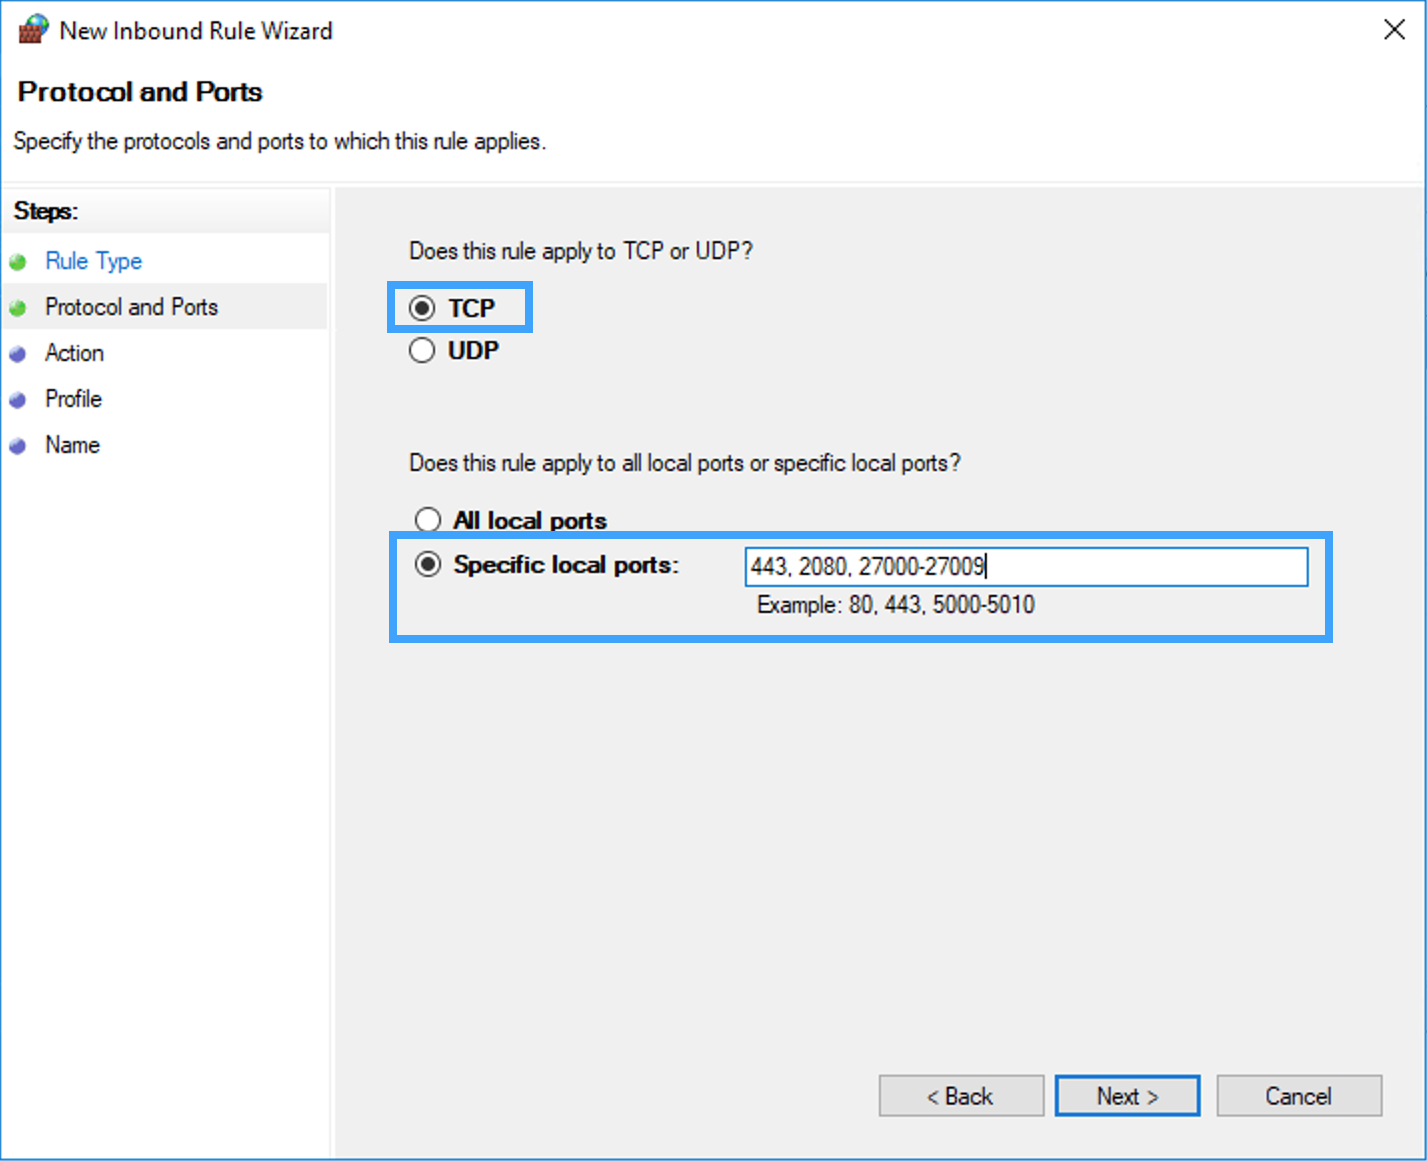
Allowed portsThe following ports must be open for NLRM to function correctly:
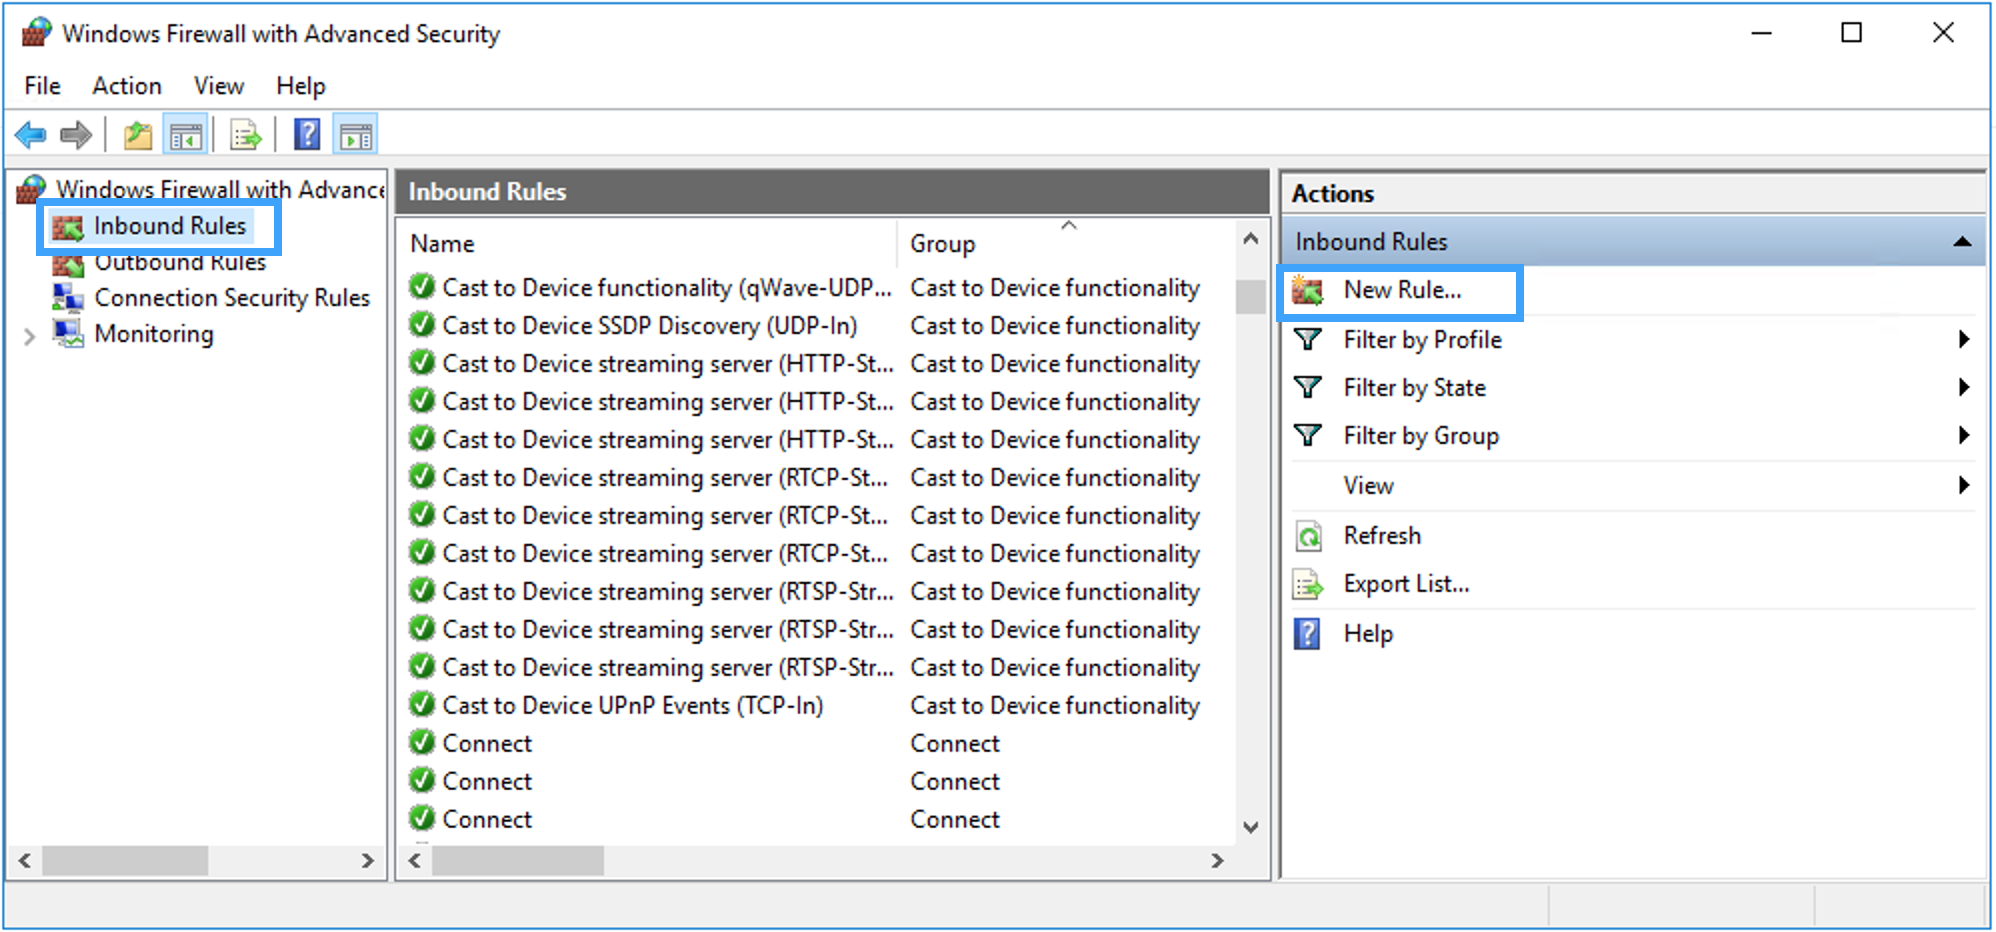
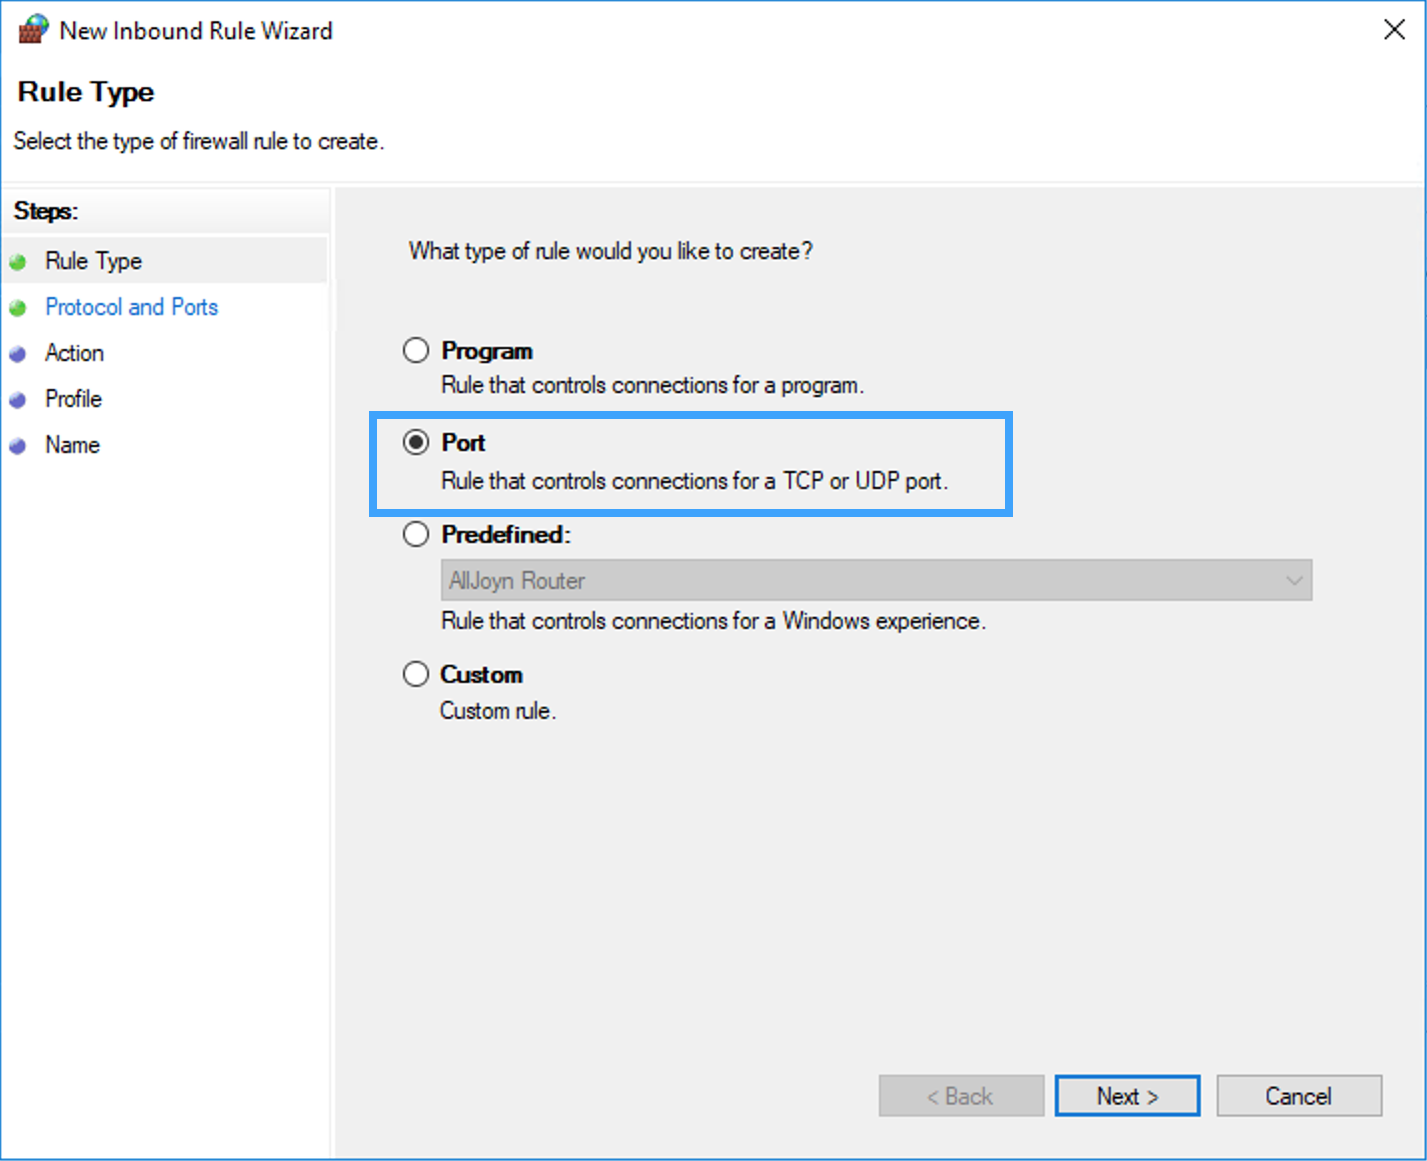
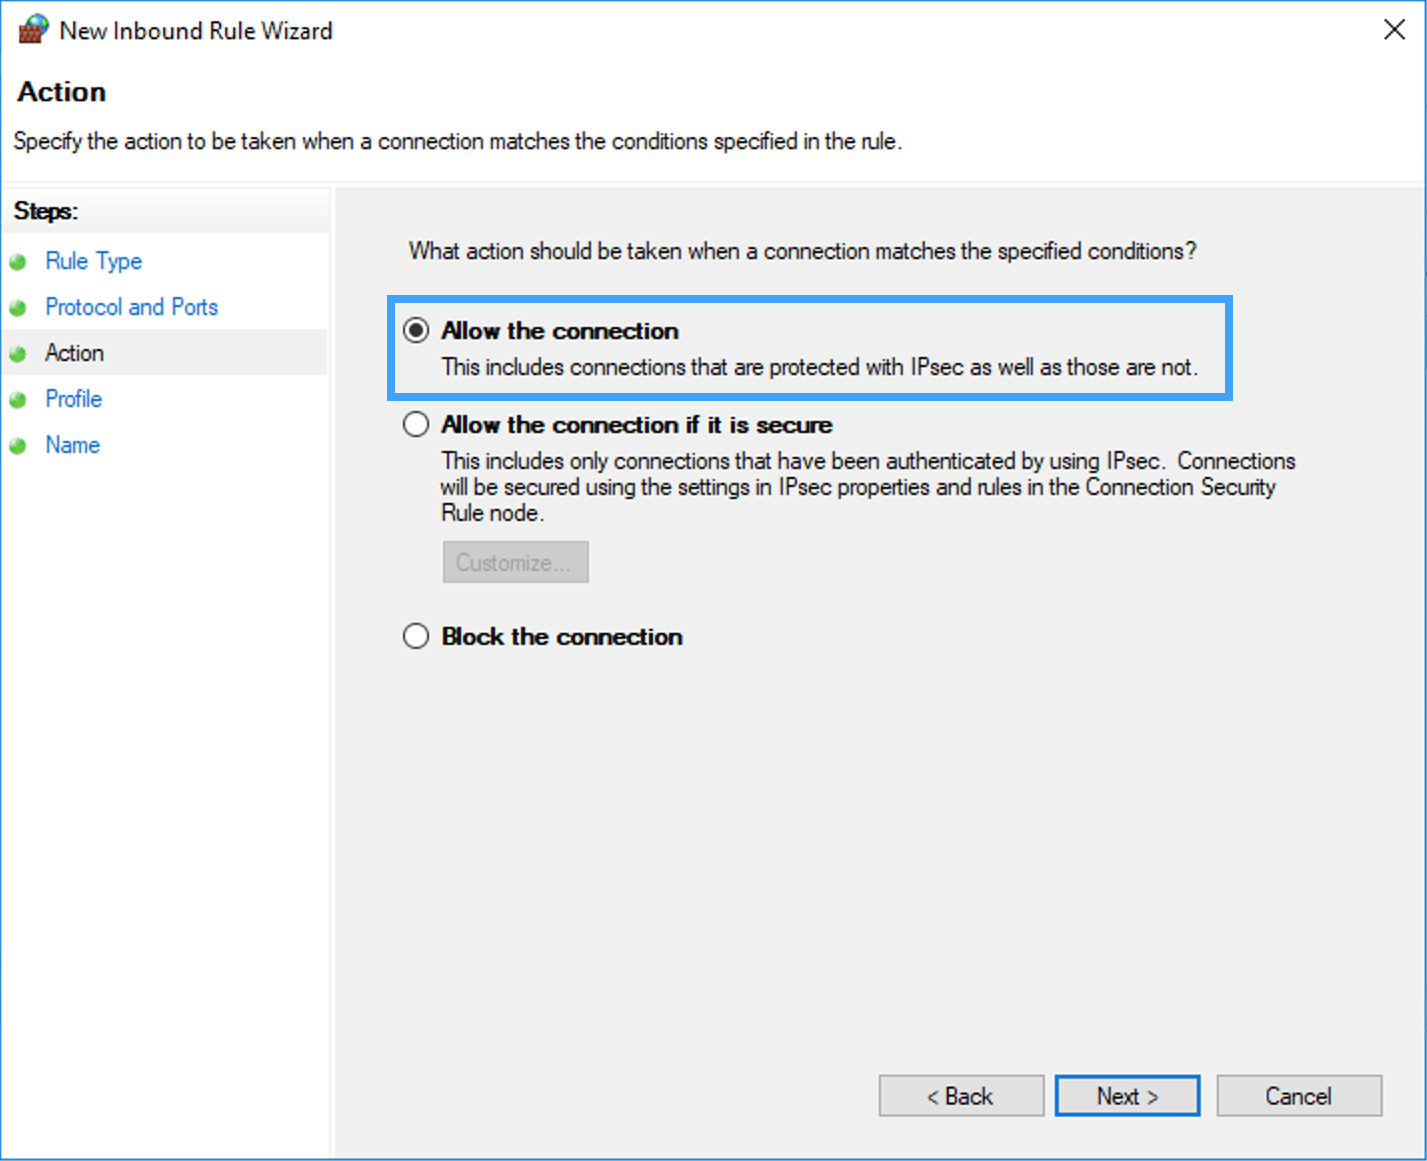
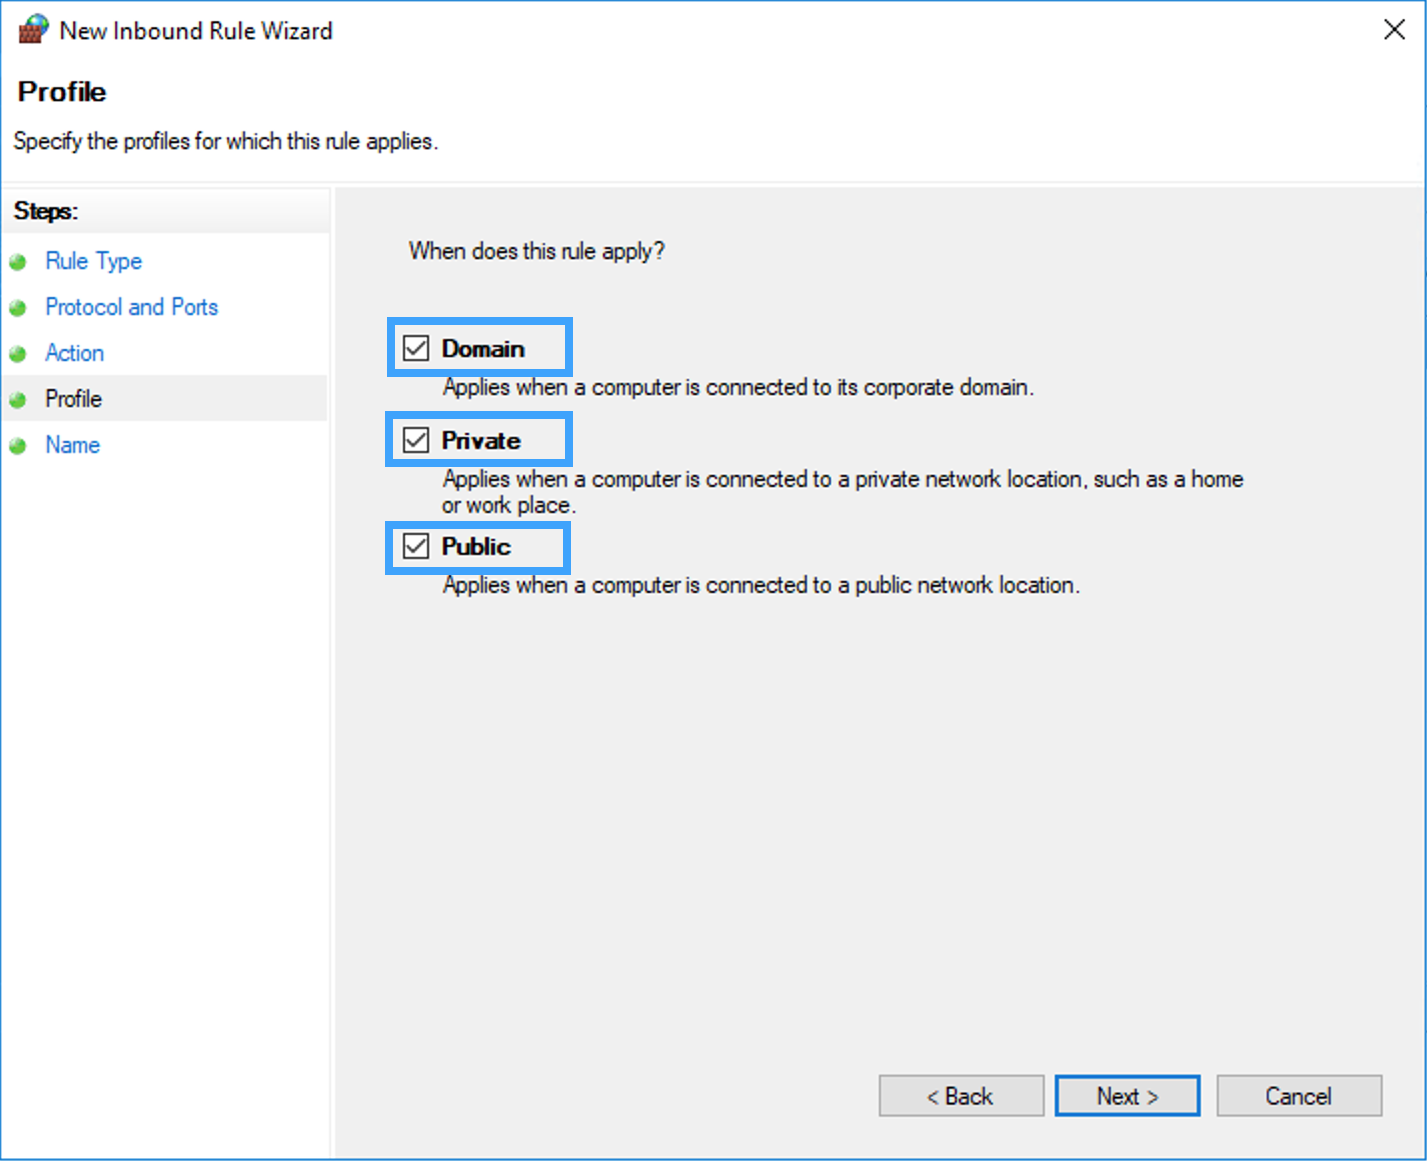
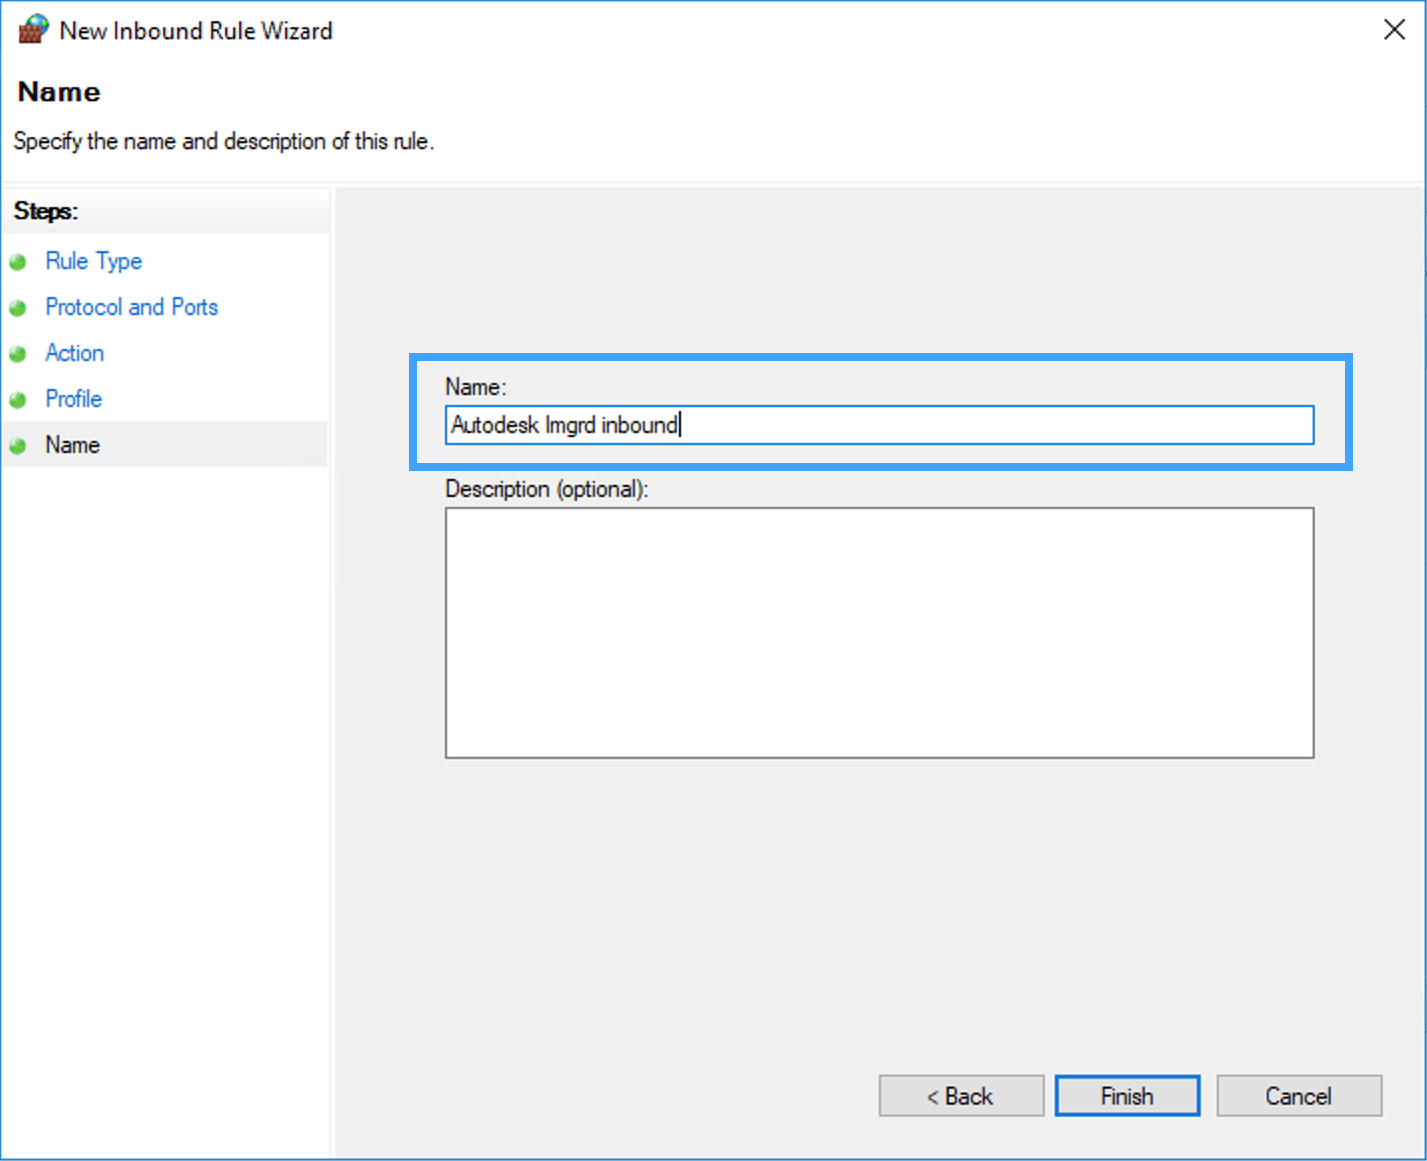
If firewall http requests to Autodesk fail, make these changes in the firewall settings (see illustrations below): :
Reinstall authorization certificate after OS upgradeIf you upgraded the operating system of the license server, authorization certificate (.auth) will need to be reinstalled. Please reuse the authorization certificate that was in use prior to the OS upgrade, or if unavailable, contact Autodesk team for a new one. Follow Install or update the NLRM authorization certificate to reinstall the certificate (.auth) file. Verify if online server is transmitting dataIf you need to verify if the online configuration is successful and reflected in server side, inspect the collection dispatcher logs (usually located at: %PROGRAMDATA%\Autodesk\NLRM<version>\logs\collection_dispatcher_car-park.log) You will see this log: And subsequently a 200 response: FailedPIIMaskingUndefined error in logsIf you observe FailedPIIMaskingUndefined error in payloads in NLRM logs, there is a missing PII Masking setting in your NLRM configuration. Please follow the steps given to configure NLRM, and restart NLRM on your license server to resume correct operation. Parent page: About Network License and Reporting Manager (NLRM) |